

Introduction
Some time ago, I wanted to open an account with PNB, for which I needed my PAN card.
When I submitted my PAN card and other documents to open the account, the banker refused to proceed because there was a minor spelling error in my father’s name.
I faced quite a bit of trouble because of this, so I decided to find a solution and share it with you.
You might have faced a similar issue yourself.
That is why, today, I will share a method that allows you to correct this type of mistake in less than 10 minutes.
What if my name has a spelling error on PAN?
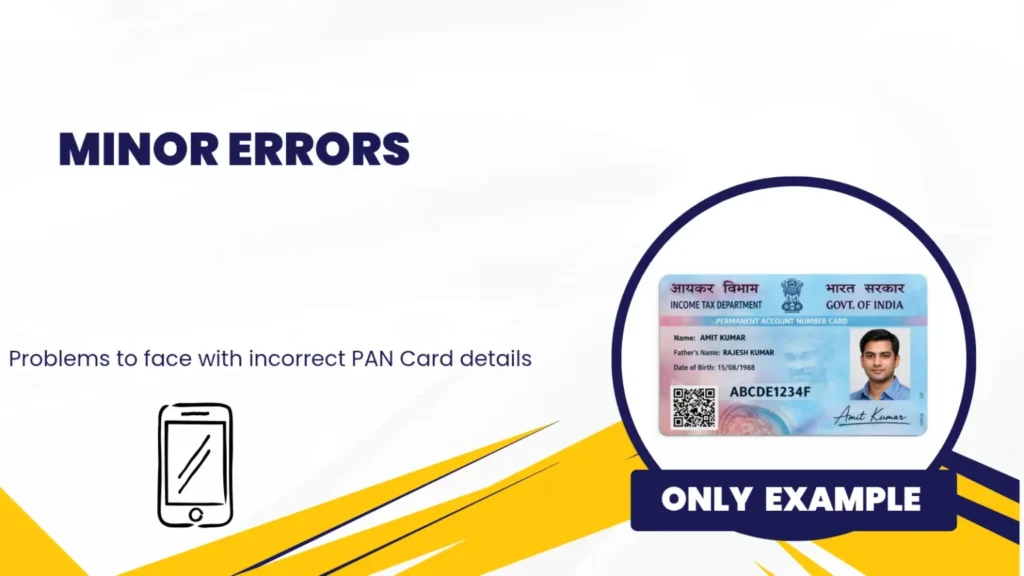
A spelling error on your PAN card might seem like a minor issue, but it can create significant problems for you.
If your PAN card details do not match those on other official documents, you could face several issues, such as:
- Problems linking your PAN with Aadhaar
- KYC verification failures
- Issues with banking and investment accounts
- Delays in filing income tax returns and receiving refunds
If you submit a PAN correction request, your PAN card number will not change.
Your PAN card number will remain the same; only the incorrect name will be updated.
Example:
- Incorrect: RohanKumar Sharma (Before application)
- Correct: Rohan Kumar Sharma (After application)
If there is a spelling error on your PAN card, you can easily correct it by submitting a PAN correction request.
I have outlined the best and simplest method for submitting a PAN correction request below; be sure to read it.
“Correct your PAN today, avoid problems tomorrow.”
What documents are required for correction in PAN card?
The same documents are not required for every PAN card correction.
Different documents are needed to correct different types of errors, such as:
Name Correction
- Aadhaar with correct name
- Passport
- Marriage Certificate (after marriage)
- Gazette Notification for legal name change
Date of Birth Correction
- Birth Certificate
- Passport
- Class 10 Marksheet/Certificate
- Driving Licence
Address Correction
- Aadhaar Card
- Passport
- Bank Statement
- Electricity/Water/Gas Bill (recent)
For any type of changes, you generally need these documents:
Identity proof, address proof, date of birth proof, PAN copy, and supporting correction documents.
How to correct spelling mistake in PAN card online
Many people want to make corrections to their PAN cards but are unable to apply for them due to a lack of proper guidance.
That is why I have provided a detailed, step-by-step process here for you.
By following these simple steps, you can submit a correction request in less than 5 minutes:
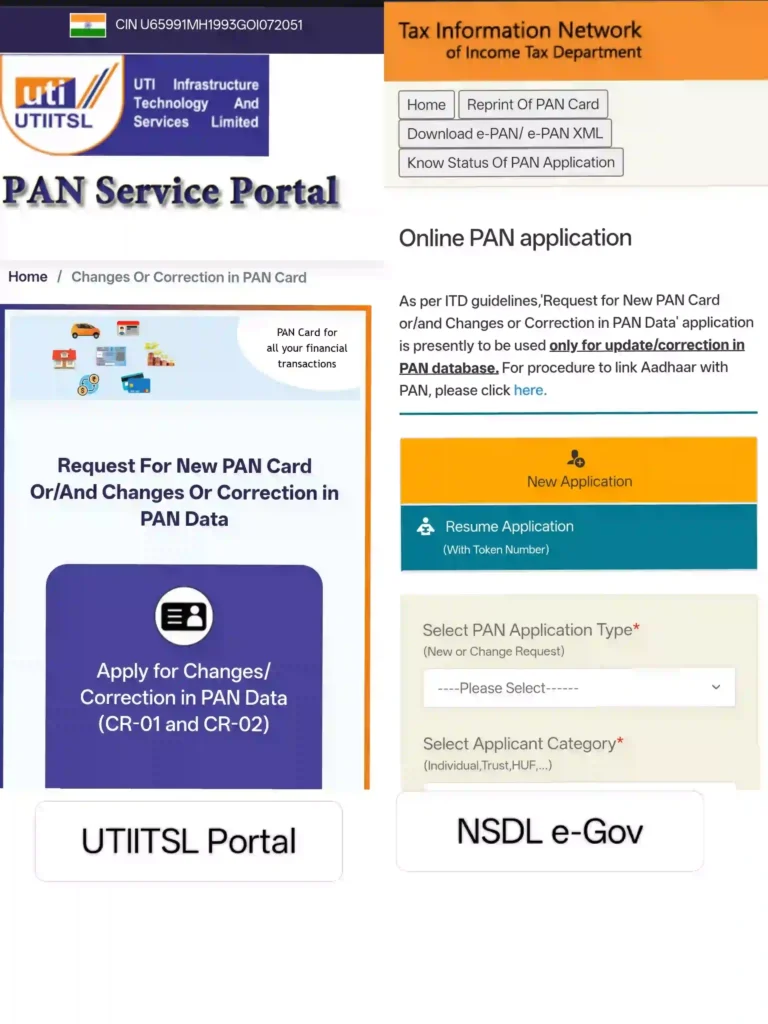
Step 1: Visit the Official Portal
For any official procedure, the first step is to visit the relevant official portal or website.
There are two official government portals for PAN card corrections:
- “Protean Portal” (formerly NSDL e-Gov)
- “UTIITSL Portal“
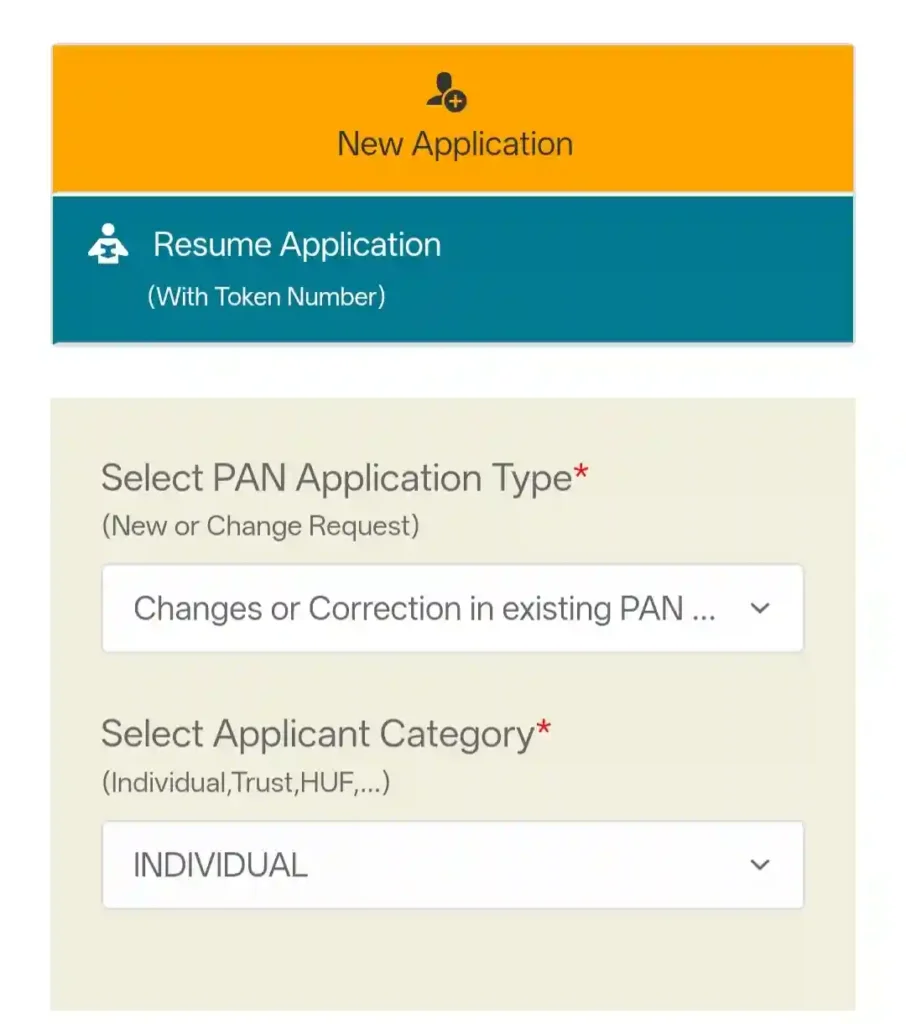
Step 2: Select “Changes or Correction in Existing PAN Data”.
In the second step, under the “PAN Application Type” section, you need to select “Changes or Correction in Existing PAN Data.”
Then, select “Individual” under the “Applicant Category,” which will appear something like this ↓
5 Easy Steps to Apply for PM AWAS Yojana— Check Here
Step 3: Fill Applicant information
On the same page, you will see a section below where you need to enter some basic details.
You should see an interface that looks something like this.
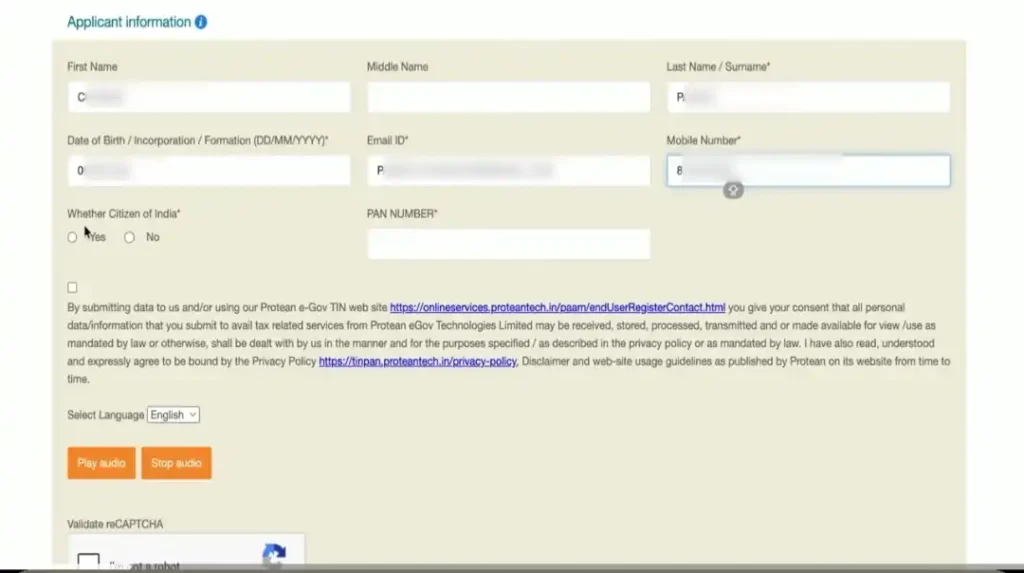
Fill in details such as First Name, Middle Name, Last Name, DOB, Email ID, and Mobile Number, and select “Yes”.
After filling in all the information, verify the reCAPTCHA and click on “Submit”.
Step 4: Select the Name Correction field and enter the correct spelling.
After clicking ‘Submit’, you will see an interface similar to this:
Image
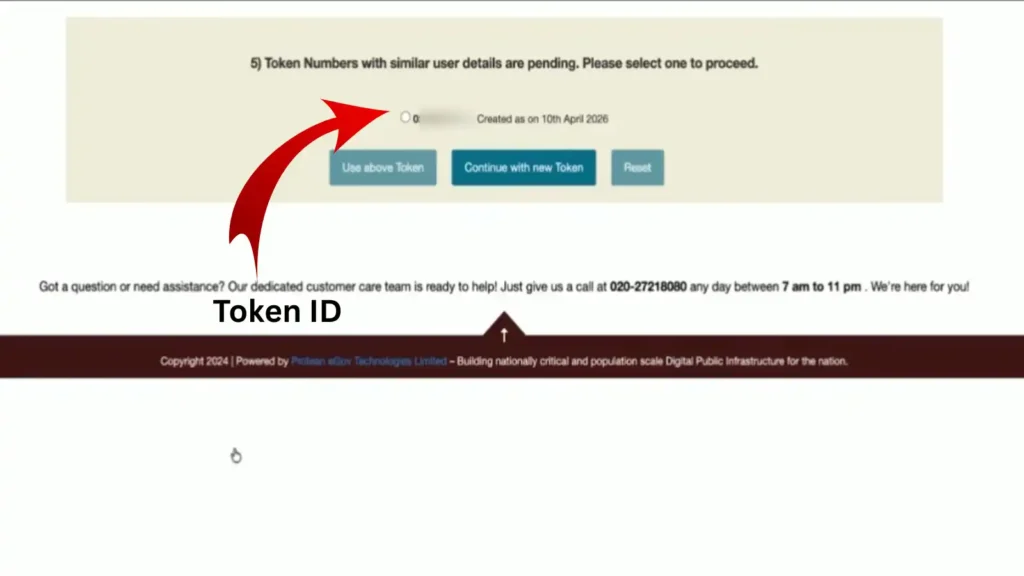
Note down the token ID displayed on your phone, then click ‘Continue’ to proceed.
You will then arrive at the next page, where you will see an interface like this:
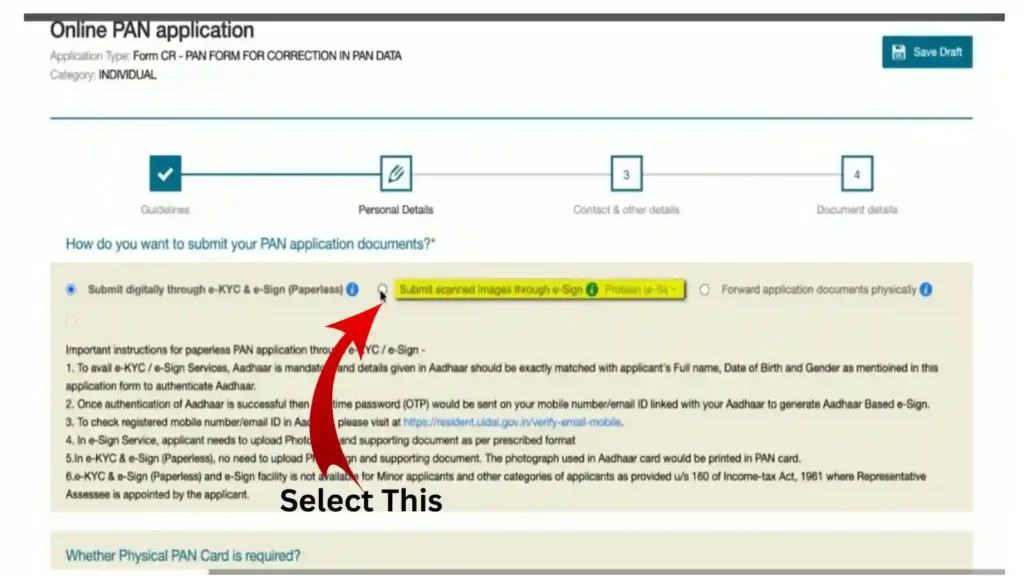
As shown in the image, you need to select the second option: “Submit scanned images through e-sign”.
You can Check this blog post — e-KYC for PAN Card correction
Step 5: Fill other important details
Now, when you scroll down, you will need to fill in details related to your Aadhaar, family, etc.
Ensure that all this information is accurate to avoid any delays in approval.
After filling in these details correctly, click on ‘Next’ to proceed to the next page.
On the next page, you will see three sections, something like this: ↓
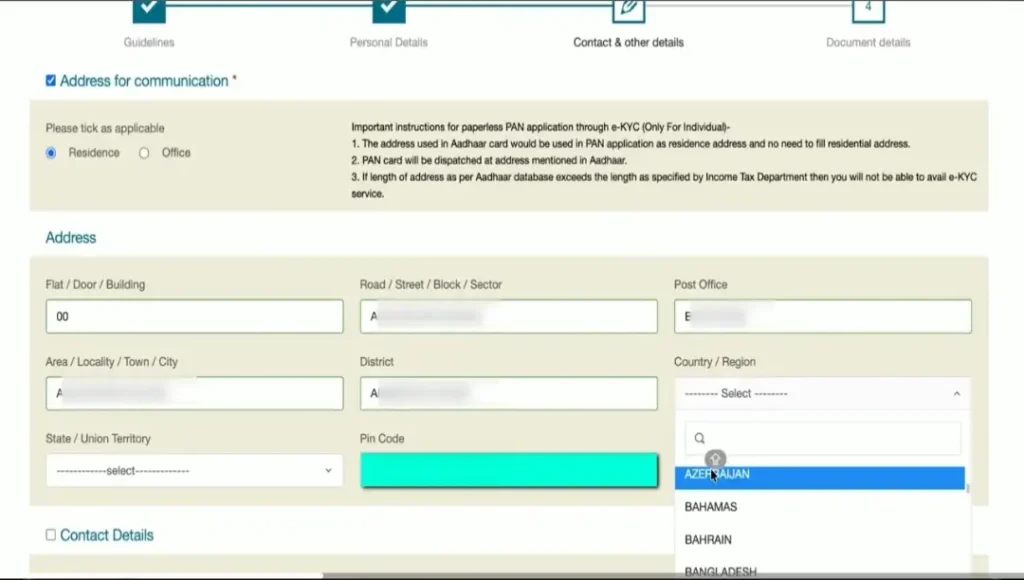
In the first section, you need to fill in your address details.
In the second section, you need to fill in your contact details.
The third section is exclusively for NRIs, so you can leave it blank.
After filling in these details, proceed to the next page.
Step 6: Upload Supporting documents showing the correct name
On this page, you need to upload documents that contain your correct details (e.g., Aadhaar, Passport, Voter ID).
Upon scrolling down, you will see an interface where you can upload the selected documents.
Sometimes, uploaded documents are not approved; therefore, please keep the following points in mind before uploading any document:
- Clear image with a clear background
- Image size under 50KB
- Merge both sides of the legal document (e.g., Aadhaar Card)
Important Note: You will see a small box next to each detail. Only the details you mark with a tick (✓) will be updated.
Step 7: Summary of Details
You will now see a summary of the details you have entered so far.
Please review the information carefully to ensure there are no errors.
After verifying all the details, simply click on “Proceed.”
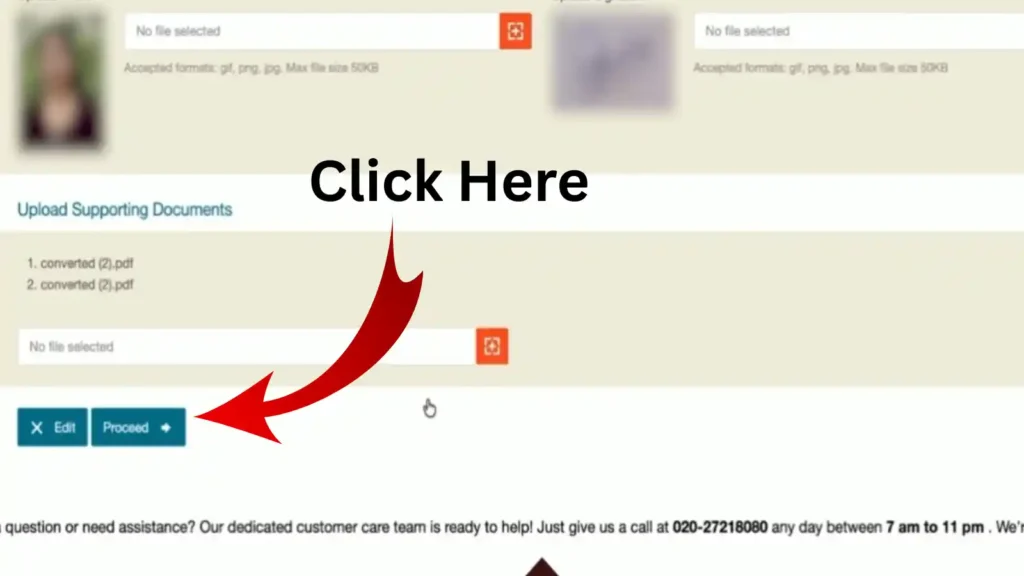
Image
Step 8: Applicable correction fee and submission
After clicking “Proceed,” you will see a payment section where you need to make the payment using any one of the available methods.
You will see various options here, such as UPI, Google Pay, etc.
In some cases, you may be required to complete Aadhaar-based verification or OTP verification after this step.
Step 9: Final Acknowledgement
After successfully completing the entire process, you will see an acknowledgement PDF.
You should now see a “Download PDF” option on the screen; click on it to download your acknowledgement.
The documents you submitted will be verified within a few days.
If you have followed the method I described, there is a 99.9% chance that your PAN card will be updated.
How Long Did the PAN Card Update Take?
You might be thinking that your PAN card will be updated immediately after applying, but it is not so.
| Stage | Expected Time |
|---|---|
| Application Submission | 5–10 Minutes |
| Verification | 1–3 Working Days |
| Correction Processing | 7–15 Working Days |
| e-PAN Delivery | Usually Within a Few Days After Approval |
| Physical PAN Delivery | Depends on Dispatch Location and Postal Service |
Note: Processing times may vary based on document verification, application volume, and whether you choose e-KYC/e-Sign or physical document submission.
PAN Details That Can Be Corrected Online
Earlier, I also thought I could only correct my name on my PAN card.
Along with the name, you can also update or correct other things:
| Detail | Can Be Corrected Online? |
|---|---|
| Name | Yes |
| Father’s Name | Yes |
| Date of Birth | Yes |
| Gender | Yes |
| Signature | Yes |
| Photograph | Yes |
| Address | Yes |
| Contact Details (Mobile Number & Email ID) | Yes |
How much fee for PAN card name correction?
If you are an Indian citizen with an address in India, the fee for PAN card correction will be around ₹107–₹110 (including GST) if you opt for a physical PAN card.
If you prefer an e-PAN, the cost will be approximately ₹66–₹72.
However, if you apply using a foreign address, the cost will be around ₹1,017–₹1,020.
Common mistakes to avoid during correction in pan card online
You need to keep a few things in mind when applying for a correction.
By avoiding these mistakes, you can speed up the PAN card correction process.
- Name mismatch with Aadhaar.
- Incorrect date of birth.
- Blurry document uploads.
- Wrong correction field selected.
- Using invalid documents.
- Spelling mistakes in the form.
- Incorrect mobile number or email.
- Not reviewing details before submission.
- Uploading the wrong proof.
- Ignoring status updates after applying.
Conclusion
If you apply by following the method I’ve outlined, I guarantee that your application will be approved within 15 days.
I have tried to cover all the important topics in this short blog post.
If you still have any questions, feel free to ask me in the comments.
“A small PAN update can make a big difference.”
Further Readings: